Showing posts with label craft. Show all posts

Friday, December 16, 2011

Homemade Christmas Card that kids can make


We decided to make a few homemade Christmas cards last night and I looked up some things for inspiration.  I finally decided on a design and I used the extra ribbon and buttons I had in my sewing closet.  If you would like to make these with your kids I will tell you how we did it.  Older kids could probably do this on their own but younger ones need some guidance.


You will need:

Ribbon or Fabric scraps - preferbly green and brown but you can do other colors
Buttons
A small star or other tree topper
Elmer's Glue
Card Stock

Instructions:

Fold card stock in half.  Cut brown ribbon to fit onto the card stock.  I cut one end straight and the other end at a diagonel.  Glue the ribbon on the middle of the page.

My oldest took this picture of me gluing on the ribbon.

Take your green ribbon or fabric scraps and figure out where you want the ribbon and how you want to cut it.  I just put a bigger piece on bottom and went from there until you get to the top and cut a small triangle out.


Next, glue on your green ribbon.  Then you can decorate it!  We chose to put little buttons on as ornaments.  We used a foam star bead for the topper.


I had the kids pick out buttons and then I put glue on the back and they put it where they wanted to on the tree.

Let the card dry overnight so that the buttons will stay on.  The white glue will dry clear (you probably already know that).  

You can give them to teachers or grandparents, uncles, aunts or cousins.  Also, just open up the card once it is dry and write your personalized message inside.

Merry Christmas!


Monday, November 28, 2011

My Felt Advent Jesse Tree - the Tree!


You have done all of the ornaments!  Now is the time to do the tree.

Here are the supplies you need:

Felt by the yard - 3/4 to 1 yard of green and white
Heat n bond light OR fabric glue - you don't have to get the Heat N Bond but it makes things a lot easier
Hook and eye closures (25 of them)
Invisible thread (optional but easier)

Go cut out (click this for the paper to print) the tree, the angel and the stem if you haven't already from Shannon's blog.  Use the colors that she states.   When cutting out the tree you will want to do this:  Fold your green fabric in half.  Use the cut out for the top layers and then layer it as you see on the instruction sheet.

Then connect the two sides at every indent with a seam.  I used invisible thread for this.

Once you do that you have a guide for where to put your ornaments.  I laid out my ornaments onto my tree and then pinned them on so I could tell where to sew the closures at.
 
This takes time so be prepared but you can do it while you are sitting on the couch watching TV - hand sew your hook closures on.


After I did that I laid out my tree on my white material.  I pinned the tree and the trunk and sewed around the tree.  After that, I pinned the angel and sewed that on.  Then I sewed the trunk and sewed around it and the X on it.

I then hemmed it on both ends.  I hemmed it about one inch.  I ended up using a dowel rod and glued ribbon to each end and tied in the middle and hung it on the back of the kids closet door in their room.

Then try it out and your done!


Now, how many of you did it?  If so please leave me a link or a comment and let me know!  Also, let me know if I left any instructions out or if you have any other questions.

Friday, November 25, 2011

My Felt Advent Jesse Tree - Days 24-25 - an angel and a baby in a manger

Hope you all had a wonderful Thanksgiving!  Today we are doing ornament numbers 24-25.   Just wanted to remind you that I use a Jesse Tree combined with an Advent calendar for this.  If you don't know anything about the Jesse Tree, please go  here and read up on it.  I ordered the book The Advent Jesse Tree: Devotions for children and Adults to Prepare for the Coming of the Christ Child at Christmas. This is where I got all of my ornaments because there is a great devotion to go with each ornament.

You can find the whole tutorial here.  Today's ornament is an angel and a baby in a manger. 


1.  Use Shannon's page to cut out the ornament.  You may go here to print it.  The ornament is at the bottom of the paper.  Cut out a colored ornament and a white ornament.

2.  Next, find your symbol.   The symbol is the book.  I just copied it.  You can look up angel clip art and use one of those.  You can also look up Jesus in a manger clip art.

3.  Cut out your shape.  You can glue this on with a felt glue (available at craft stores) or use your heat and bond to attach it (read the instructions that come with it) or hot glue it.  Hot glue doesn't hold quite as well.  You can sew this down, but it is so tiny that I just used the heat and bond and ironed it.
**You could get your Heat N Bond Lite and trace your symbol onto it.  Then you will want to iron it onto the white  felt.  When using your iron, put it onto the steam setting even though the Heat N Lite instructions say not to.  Use a tea towel or something over the felt as your ironing it because felt will burn.  Yes, I said felt will burn. 

4.  Sew the white and color-side of the ornaments together.  Leave an opening at the top.  I only sewed the bottom half.  I used "invisible thread" to sew each of my ornaments so you won't have to keep changing your thread unless you just want to use white thread which is fine too.

5.  Once your ornament is put together glue it (see above) on your white side of your ornament (I didn't do this).

6.  Put your number on the color side of the ornament.  You can cut out the numbers from here.  You could also buy the stick on felt numbers at your local craft store.  Make sure they will fit onto your ornament before you buy them.  

Let all of that dry and make sure it is good and "stuck" on.  Then you will take a whole punch (I used a craft whole punch) and punch a whole in the top tab of each side of the ornament.  You will want to do each side because you will be turning the ornament over.  This is kind of tough but it will work if you do it slowly.  It may stick on one side so just take your scissors and cut it the rest of the way off.


Now the ornaments are done!  We will do the tree next!

Wednesday, November 23, 2011

My Felt Advent Jesse Tree - Day 23 - A candle or light

Today we are doing ornament number 23.   Just wanted to remind you that I use a Jesse Tree combined with an Advent calendar for this.  If you don't know anything about the Jesse Tree, please go  here and read up on it.  I ordered the book The Advent Jesse Tree: Devotions for children and Adults to Prepare for the Coming of the Christ Child at Christmas. This is where I got all of my ornaments because there is a great devotion to go with each ornament.

You can find the whole tutorial here.  Today's ornament is a candle or light.  Sorry my picture did not turn out well for this one.


1.  Use Shannon's page to cut out the ornament.  You may go here to print it.  The ornament is at the bottom of the paper.  Cut out a colored ornament and a white ornament.

2.  Next, find your symbol.   The symbol is the book.  I just copied it.  You can look up candle clip art and use one of those.

3.  Cut out your shape.  You can glue this on with a felt glue (available at craft stores) or use your heat and bond to attach it (read the instructions that come with it) or hot glue it.  Hot glue doesn't hold quite as well.  You can sew this down, but it is so tiny that I just used the heat and bond and ironed it.
**You could get your Heat N Bond Lite and trace your symbol onto it.  Then you will want to iron it onto the white  felt.  When using your iron, put it onto the steam setting even though the Heat N Lite instructions say not to.  Use a tea towel or something over the felt as your ironing it because felt will burn.  Yes, I said felt will burn. 

4.  Sew the white and color-side of the ornaments together.  Leave an opening at the top.  I only sewed the bottom half.  I used "invisible thread" to sew each of my ornaments so you won't have to keep changing your thread unless you just want to use white thread which is fine too.

5.  Once your ornament is put together glue it (see above) on your white side of your ornament (I didn't do this).

6.  Put your number on the color side of the ornament.  You can cut out the numbers from here.  You could also buy the stick on felt numbers at your local craft store.  Make sure they will fit onto your ornament before you buy them.  

Let all of that dry and make sure it is good and "stuck" on.  Then you will take a whole punch (I used a craft whole punch) and punch a whole in the top tab of each side of the ornament.  You will want to do each side because you will be turning the ornament over.  This is kind of tough but it will work if you do it slowly.  It may stick on one side so just take your scissors and cut it the rest of the way off.


Two more ornaments to go!

Tuesday, November 22, 2011

My Felt Advent Jesse Tree - Days 20-22 - a fiery furnace, a brick wall, and a star

Today we are doing ornament numbers 20-22.   I fell just a bit behind -sorry!  Just wanted to remind you that I use a Jesse Tree combined with an Advent calendar for this.  If you don't know anything about the Jesse Tree, please go  here and read up on it.  I ordered the book The Advent Jesse Tree: Devotions for children and Adults to Prepare for the Coming of the Christ Child at Christmas. This is where I got all of my ornaments because there is a great devotion to go with each ornament.

You can find the whole tutorial here.  Today's ornaments are a fiery furnace, a brick wall, and a star.


1.  Use Shannon's page to cut out the ornament.  You may go here to print it.  The ornament is at the bottom of the paper.  Cut out a colored ornament and a white ornament.

2.  Next, find your symbol.   The symbol is from here.   You will find the star on page 6.  The brick wall is just a rectangle cut out of gray felt.  I drew on the bricks and then colored in the underpass with a black marker.   I took the fiery furnace from the picture in the Jesse Tree book.  All I did was cut out that shape which you could probably do yourself.  I made a tiny oven part out of black felt I glued on than, cut out a fire shape out of the orange and glued that onto the black.  Again I drew the bricks on myself.

3.  Cut out your shape.  You can glue this on with a felt glue (available at craft stores) or use your heat and bond to attach it (read the instructions that come with it) or hot glue it.  Hot glue doesn't hold quite as well.  You can sew this down, but it is so tiny that I just used the heat and bond and ironed it.
**You could get your Heat N Bond Lite and trace your symbol onto it.  Then you will want to iron it onto the white  felt.  When using your iron, put it onto the steam setting even though the Heat N Lite instructions say not to.  Use a tea towel or something over the felt as your ironing it because felt will burn.  Yes, I said felt will burn. 

4.  Sew the white and color-side of the ornaments together.  Leave an opening at the top.  I only sewed the bottom half.  I used "invisible thread" to sew each of my ornaments so you won't have to keep changing your thread unless you just want to use white thread which is fine too.

5.  Once your ornament is put together glue it (see above) on your white side of your ornament (I didn't do this).

6.  Put your number on the color side of the ornament.  You can cut out the numbers from here.  You could also buy the stick on felt numbers at your local craft store.  Make sure they will fit onto your ornament before you buy them.  

Let all of that dry and make sure it is good and "stuck" on.  Then you will take a whole punch (I used a craft whole punch) and punch a whole in the top tab of each side of the ornament.  You will want to do each side because you will be turning the ornament over.  This is kind of tough but it will work if you do it slowly.  It may stick on one side so just take your scissors and cut it the rest of the way off.

You are almost done - just three days to go!

Saturday, November 19, 2011

My Felt Advent Jesse Tree - Day 19 - A Bethlehem town silhouette with a star

Today we are doing ornament number 19.   Just wanted to remind you that I use a Jesse Tree combined with an Advent calendar for this.  If you don't know anything about the Jesse Tree, please go  here and read up on it.  I ordered the book The Advent Jesse Tree: Devotions for children and Adults to Prepare for the Coming of the Christ Child at Christmas. This is where I got all of my ornaments because there is a great devotion to go with each ornament.

You can find the whole tutorial here.  Today's ornament is a Bethlehem town silhouette with a star.


1.  Use Shannon's page to cut out the ornament.  You may go here to print it.  The ornament is at the bottom of the paper.  Cut out a colored ornament and a white ornament.

2.  Next, find your symbol.   The symbol is from here.   You will find the heart on page 5.  I just used a fine ink pen to draw the windows and doors.

3.  Cut out your shape.  You can glue this on with a felt glue (available at craft stores) or use your heat and bond to attach it (read the instructions that come with it) or hot glue it.  Hot glue doesn't hold quite as well.  You can sew this down, but it is so tiny that I just used the heat and bond and ironed it.
**You could get your Heat N Bond Lite and trace your symbol onto it.  Then you will want to iron it onto the white  felt.  When using your iron, put it onto the steam setting even though the Heat N Lite instructions say not to.  Use a tea towel or something over the felt as your ironing it because felt will burn.  Yes, I said felt will burn. 

4.  Sew the white and color-side of the ornaments together.  Leave an opening at the top.  I only sewed the bottom half.  I used "invisible thread" to sew each of my ornaments so you won't have to keep changing your thread unless you just want to use white thread which is fine too.

5.  Once your ornament is put together glue it (see above) on your white side of your ornament (I didn't do this).

6.  Put your number on the color side of the ornament.  You can cut out the numbers from here.  You could also buy the stick on felt numbers at your local craft store.  Make sure they will fit onto your ornament before you buy them.  

Let all of that dry and make sure it is good and "stuck" on.  Then you will take a whole punch (I used a craft whole punch) and punch a whole in the top tab of each side of the ornament.  You will want to do each side because you will be turning the ornament over.  This is kind of tough but it will work if you do it slowly.  It may stick on one side so just take your scissors and cut it the rest of the way off.

Just a few more ornaments to go and then we will work on the tree and background.  You will be done in plenty of time to hang it up on December 1st!

Friday, November 18, 2011

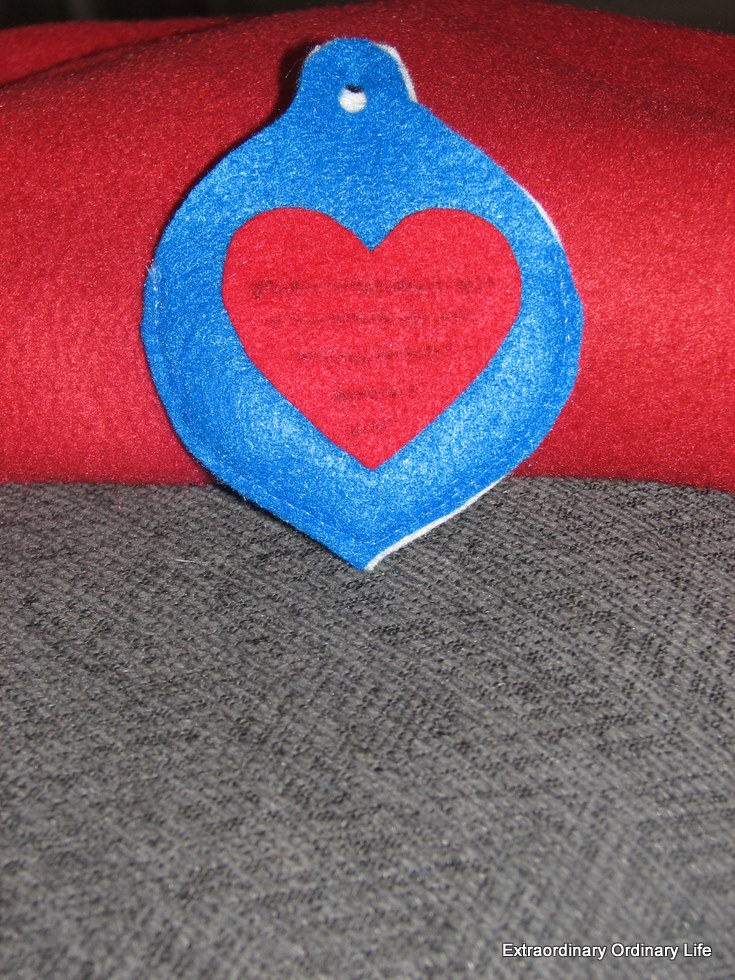
My Felt Advent Jesse Tree - Day 18 - A Heart with writing on it

Today we are doing ornament number 18.   Just wanted to remind you that I use a Jesse Tree combined with an Advent calendar for this.  If you don't know anything about the Jesse Tree, please go  here and read up on it.  I ordered the book The Advent Jesse Tree: Devotions for children and Adults to Prepare for the Coming of the Christ Child at Christmas. This is where I got all of my ornaments because there is a great devotion to go with each ornament.

You can find the whole tutorial here.  Today's ornament is a heart with writing on it.


1.  Use Shannon's page to cut out the ornament.  You may go here to print it.  The ornament is at the bottom of the paper.  Cut out a colored ornament and a white ornament.

2.  Next, find your symbol.   The symbol is from here.   You will find the heart on page 6.  I just used a fine ink pen to write on it.

3.  Cut out your shape.  You can glue this on with a felt glue (available at craft stores) or use your heat and bond to attach it (read the instructions that come with it) or hot glue it.  Hot glue doesn't hold quite as well.  You can sew this down, but it is so tiny that I just used the heat and bond and ironed it.
**You could get your Heat N Bond Lite and trace your symbol onto it.  Then you will want to iron it onto the white  felt.  When using your iron, put it onto the steam setting even though the Heat N Lite instructions say not to.  Use a tea towel or something over the felt as your ironing it because felt will burn.  Yes, I said felt will burn. 

4.  Sew the white and color-side of the ornaments together.  Leave an opening at the top.  I only sewed the bottom half.  I used "invisible thread" to sew each of my ornaments so you won't have to keep changing your thread unless you just want to use white thread which is fine too.

5.  Once your ornament is put together glue it (see above) on your white side of your ornament (I didn't do this).

6.  Put your number on the color side of the ornament.  You can cut out the numbers from here.  You could also buy the stick on felt numbers at your local craft store.  Make sure they will fit onto your ornament before you buy them.  

Let all of that dry and make sure it is good and "stuck" on.  Then you will take a whole punch (I used a craft whole punch) and punch a whole in the top tab of each side of the ornament.  You will want to do each side because you will be turning the ornament over.  This is kind of tough but it will work if you do it slowly.  It may stick on one side so just take your scissors and cut it the rest of the way off.

Just a few more ornaments to go and then we will work on the tree and background.  You will be done in plenty of time to hang it up on December 1st!

Thursday, November 17, 2011

My Felt Advent Jesse Tree - Day 17- A cross

Today we are doing ornament number 17.   Just wanted to remind you that I use a Jesse Tree combined with an Advent calendar for this.  If you don't know anything about the Jesse Tree, please go  here and read up on it.  I ordered the book The Advent Jesse Tree: Devotions for children and Adults to Prepare for the Coming of the Christ Child at Christmas. This is where I got all of my ornaments because there is a great devotion to go with each ornament.
You can find the whole tutorial here.  Today's ornament is a cross.


1.  Use Shannon's page to cut out the ornament.  You may go here to print it.  The ornament is at the bottom of the paper.  Cut out a colored ornament and a white ornament.

2.  Next, find your symbol.    Go to a clip art search (here) and pick the cross you like best.  Right click the picture and paste it into Word.  You can make this smaller (or bigger) in Word if you need to. 

3.  Cut out your shape.  You can glue this on with a felt glue (available at craft stores) or use your heat and bond to attach it (read the instructions that come with it) or hot glue it.  Hot glue doesn't hold quite as well.  You can sew this down, but it is so tiny that I just used the heat and bond and ironed it.
**You could get your Heat N Bond Lite and trace your symbol onto it.  Then you will want to iron it onto the white  felt.  When using your iron, put it onto the steam setting even though the Heat N Lite instructions say not to.  Use a tea towel or something over the felt as your ironing it because felt will burn.  Yes, I said felt will burn. 

4.  Sew the white and color-side of the ornaments together.  Leave an opening at the top.  I only sewed the bottom half.  I used "invisible thread" to sew each of my ornaments so you won't have to keep changing your thread unless you just want to use white thread which is fine too.

5.  Once your ornament is put together glue it (see above) on your white side of your ornament (I didn't do this).

6.  Put your number on the color side of the ornament.  You can cut out the numbers from here.  You could also buy the stick on felt numbers at your local craft store.  Make sure they will fit onto your ornament before you buy them.  

Let all of that dry and make sure it is good and "stuck" on.  Then you will take a whole punch (I used a craft whole punch) and punch a whole in the top tab of each side of the ornament.  You will want to do each side because you will be turning the ornament over.  This is kind of tough but it will work if you do it slowly.  It may stick on one side so just take your scissors and cut it the rest of the way off.

There you are - you getting close to being done!  Any questions?  Also, if you are doing this will you leave me a comment and then post a link to your tree when you are done if you have a blog?

Wednesday, November 16, 2011

My Felt Advent Jesse Tree - Day 16 - A shepherd's staff

Today we are doing ornament number 16.   Just wanted to remind you that I use a Jesse Tree combined with an Advent calendar for this.  If you don't know anything about the Jesse Tree, please go  here and read up on it.  I ordered the book The Advent Jesse Tree: Devotions for children and Adults to Prepare for the Coming of the Christ Child at Christmas. This is where I got all of my ornaments because there is a great devotion to go with each ornament.

You can find the whole tutorial here.  Today's ornament is a shepherd's staff. 


1.  Use Shannon's page to cut out the ornament.  You may go here to print it.  The ornament is at the bottom of the paper.  Cut out a colored ornament and a white ornament.

2.  Next, find your symbol.    Today's ornament is actually a lamb and a shepherd's staff but I just did the staff.  You could probably draw this yourself but I am not very artistic so I needed a picture.  Right click the picture and paste it into Word.  You can make this smaller (or bigger) in Word if you need to.  Just use the staff in this picture.  Just cut it out.  Here is an idea:

3.  Cut out your shape.  You can glue this on with a felt glue (available at craft stores) or use your heat and bond to attach it (read the instructions that come with it) or hot glue it.  Hot glue doesn't hold quite as well.  You can sew this down, but it is so tiny that I just used the heat and bond and ironed it.
**You could get your Heat N Bond Lite and trace your symbol onto it.  Then you will want to iron it onto the white  felt.  When using your iron, put it onto the steam setting even though the Heat N Lite instructions say not to.  Use a tea towel or something over the felt as your ironing it because felt will burn.  Yes, I said felt will burn. 

4.  Sew the white and color-side of the ornaments together.  Leave an opening at the top.  I only sewed the bottom half.  I used "invisible thread" to sew each of my ornaments so you won't have to keep changing your thread unless you just want to use white thread which is fine too.

5.  Once your ornament is put together glue it (see above) on your white side of your ornament (I didn't do this).

6.  Put your number on the color side of the ornament.  You can cut out the numbers from here.  You could also buy the stick on felt numbers at your local craft store.  Make sure they will fit onto your ornament before you buy them.  

Let all of that dry and make sure it is good and "stuck" on.  Then you will take a whole punch (I used a craft whole punch) and punch a whole in the top tab of each side of the ornament.  You will want to do each side because you will be turning the ornament over.  This is kind of tough but it will work if you do it slowly.  It may stick on one side so just take your scissors and cut it the rest of the way off.

There you are - you made almost half of your ornaments!  Any questions?  Also, if you are doing this will you leave me a comment and then post a link to your tree when you are done if you have a blog?

Tuesday, November 15, 2011

My Felt Advent Jesse Tree - Day 15 - A dove and a crown

Today we are doing ornament number 15.   Just wanted to remind you that I use a Jesse Tree combined with an Advent calendar for this.  If you don't know anything about the Jesse Tree, please go  here and read up on it.  I ordered the book The Advent Jesse Tree: Devotions for children and Adults to Prepare for the Coming of the Christ Child at Christmas. This is where I got all of my ornaments because there is a great devotion to go with each ornament.

You can find the whole tutorial here.  Today's ornament is a dove and a crown. 

1.  Use Shannon's page to cut out the ornament.  You may go here to print it.  The ornament is at the bottom of the paper.  Cut out a colored ornament and a white ornament.

2.  Next, find your symbol.    Go to a clip art search (here) and pick the dove and crown you like best.  Right click the picture and paste it into Word.  You can make this smaller (or bigger) in Word if you need to.  I just draw the eyes on with a thin marker or a pen.  Here are few ideas:


3.  Cut out your shape.  You can glue this on with a felt glue (available at craft stores) or use your heat and bond to attach it (read the instructions that come with it) or hot glue it.  Hot glue doesn't hold quite as well.  You can sew this down, but it is so tiny that I just used the heat and bond and ironed it.
**You could get your Heat N Bond Lite and trace your symbol onto it.  Then you will want to iron it onto the white  felt.  When using your iron, put it onto the steam setting even though the Heat N Lite instructions say not to.  Use a tea towel or something over the felt as your ironing it because felt will burn.  Yes, I said felt will burn. 

4.  Sew the white and color-side of the ornaments together.  Leave an opening at the top.  I only sewed the bottom half.  I used "invisible thread" to sew each of my ornaments so you won't have to keep changing your thread unless you just want to use white thread which is fine too.

5.  Once your ornament is put together glue it (see above) on your white side of your ornament (I didn't do this).

6.  Put your number on the color side of the ornament.  You can cut out the numbers from here.  You could also buy the stick on felt numbers at your local craft store.  Make sure they will fit onto your ornament before you buy them.  

Let all of that dry and make sure it is good and "stuck" on.  Then you will take a whole punch (I used a craft whole punch) and punch a whole in the top tab of each side of the ornament.  You will want to do each side because you will be turning the ornament over.  This is kind of tough but it will work if you do it slowly.  It may stick on one side so just take your scissors and cut it the rest of the way off.

There you are - you made almost half of your ornaments!  Any questions?  Also, if you are doing this will you leave me a comment and then post a link to your tree when you are done if you have a blog?

Monday, November 14, 2011

My Felt Advent Jesse Tree - Day 14

Today we are doing ornament number 14.   Just wanted to remind you that I use a Jesse Tree combined with an Advent calendar for this.  If you don't know anything about the Jesse Tree, please go  here and read up on it.  I ordered the book The Advent Jesse Tree: Devotions for children and Adults to Prepare for the Coming of the Christ Child at Christmas. This is where I got all of my ornaments because there is a great devotion to go with each ornament.

You can find the whole tutorial here.  Today's ornament is a lion and a lamb. 

1.  Use Shannon's page to cut out the ornament.  You may go here to print it.  The ornament is at the bottom of the paper.  Cut out a colored ornament and a white ornament.

2.  Next, find your symbol.    I know you are jealous of my crafting skills but try to contain yourself.  I am sure you can do better on this one than I did. You will notice I am not the best at art work.  My lion and lamb look more like cartoon characters but the lion isn't suppose to look very threatening though right?   The one below is again from doing a clip art search.  You can make this smaller (or bigger) in Word if you need to (just right click copy and paste in Word).  I just draw the faces on with a thin marker or a pen.


3.  Cut out your shape.  You can glue this on with a felt glue (available at craft stores) or use your heat and bond to attach it (read the instructions that come with it) or hot glue it.  Hot glue doesn't hold quite as well.  You can sew this down, but it is so tiny that I just used the heat and bond and ironed it.
**You could get your Heat N Bond Lite and trace your symbol onto it.  Then you will want to iron it onto the white  felt.  When using your iron, put it onto the steam setting even though the Heat N Lite instructions say not to.  Use a tea towel or something over the felt as your ironing it because felt will burn.  Yes, I said felt will burn. 

4.  Sew the white and color-side of the ornaments together.  Leave an opening at the top.  I only sewed the bottom half.  I used "invisible thread" to sew each of my ornaments so you won't have to keep changing your thread unless you just want to use white thread which is fine too.

5.  Once your ornament is put together glue it (see above) on your white side of your ornament (I didn't do this).

6.  Put your number on the color side of the ornament.  You can cut out the numbers from here.  You could also buy the stick on felt numbers at your local craft store.  Make sure they will fit onto your ornament before you buy them.  

Let all of that dry and make sure it is good and "stuck" on.  Then you will take a whole punch (I used a craft whole punch) and punch a whole in the top tab of each side of the ornament.  You will want to do each side because you will be turning the ornament over.  This is kind of tough but it will work if you do it slowly.  It may stick on one side so just take your scissors and cut it the rest of the way off.

There you are - you made almost half of your ornaments!  Any questions?  Also, if you are doing this will you leave me a comment and then post a link to your tree when you are done if you have a blog?

Printfriendly